CLASS NOTES – TRAIL RECIPES

Re posted from Lori of the Delaware Dames

The following is a handout from the TRAILSIDE FOOD WITH GROCERY STORE GOODIES.

TRAILSIDE COOKING: BACKPACKING FOOD FROM YOUR GROCERY STORE

Many years ago, your backpacking menu was probably limited to prepackaged backpacking foods, perhaps military “meals ready to eat”, and even canned goods.
But these days, with consumers demanding quick, easy to prepare meals at home, there are many backpacking menu options right on your local grocery store shelves.

Below are some easy recipes for the trail to get your grocery store backpacking menu kickstarted.

Southwest Soft Tacos
1 packet Uncle Ben’s Whole Grain Ready Rice Santa Fe
7-ounce chicken pouch
4 whole wheat tortillas
Tabasco to taste

Empty rice and chicken into pot. Stir, cover, heat over low flame. Add water if necessary. Add Tabasco. Fill tortillas. Serves 2.

Catskills Chicken Riggies
8 ounces rigatoni
½ tsp garlic powder
½ tsp dehydrated onion
½ cup sun-dried tomatoes, chopped
1 7-ounce pouch chicken
½ cup Parmesan cheese
½ cup water

Saute tomatoes and spices in olive oil and water until thick. Add chicken and half the Parmesan. Serve over cooked and drained pasta and top with remaining cheese. Serves 2.

Rib-sticking Noodle Soup
1 Lipton’s Chicken Soup Mix
6 cups water
1 7-ounce pouch chicken
8 ounces macaroni
1 stalk celery or equivalent amount of other trail-sturdy veg such as carrot or onion.

Bring wataer to a boil. Whisk in soup mix with a fork. Add chicken, macaroni, and chopped celery. Return pot to a boil, then simmer for 1ominutes or until pasta is al dente. Serves 2

Creekside Lentils
1 cup lentils
1packet instant tomato soup
1 tablespoon chili powder
1 tablespoon dried onion
1 teaspoon oregano
1 teaspoon garlic powder
Trail-sturdy cheese such as Baby Bel, Parmesan, or Laughing Cow

Add all ingredients except cheese to 4 cups of water and bring to a boil. Simmer for 15 minutes (until lentils are soft). Top with cheese to taste. Serves 2.

Rockytop Tortellini
8 ounces Barilla dry tortellini
½ envelope McCormick’s marinara sauce mix
½ envelope McCormick’s pesto sauce mix
2 ounces sliced pepperoni
Olive oil

Cook pasta according to package directions and drain, leaving 1 cup water in the pot with the pasta. Stir in both sauce pouches and add 3 tablespoons olive oil. Stir and add pepperoni. Serves 2

Shenandoah Surprise
½ of a 21-ounce box brownie mix (transfer to a Ziploc bag)
¼-cup powdered milk
2 cups boiling water Graham crackers
1 apple

Combine brownie mix with powdered milk in a pot. Slowly add boiling water and stir until the mix reaches the consistency of pudding. Serve fondue-style, dipping graham crackers, sliced applies, or a spoon! Serves 4.

Easy Chicken Salad in a Pita
1 7-ounce pouch chicken
½ cup raisins
¼ cup walnuts
2 mayo packets
2 whole wheat pitas

Mix together chicken, raisins, walnuts, and mayonnaise in a zip-top bag. Spoon salad inside pita. Serves 2.

Backpacking 101-Lesson 1

Life on the AT
This is a guest post from the Delaware Valley Trail Dames new blog!  Link to them here so you can follow their adventures!!


After 2 years enjoying fabulous day hikes, our DelVal Dames have decided to take our hiking to the next level. We’re planning for a backpacking trip later this year. We have a small but enthusiastic group of ladies who want to give this a try. They have little to no experience, but that’s not stopping anyone. I’m so proud of them! And I’m amazed that they have fath in me to teach them how to do this.

Our little core of committed hikers assembled recently to hear me talk about backpacking. I had to come clean to them, though. I told them that I have an ulterior motive. I’m building a cult. Yes, that’s right. I love to hike for days at a time. I really do. But I’m no longer the foolish 18-year-old who heads out alone. Now, I’m nearly 50, wiser, and more mature. For me, the best part of hiking is sharing the experience with friends. So, these clinics are just part of my campaign to get people to go backpacking with me.

Consider yourselves warned. But also be warned, that we will have fun. Above all, though, I want us to be safe which means, just like all good scouts, we must be prepared. What follows are our first preparations for what I hope will be a wonderful backpacking adventure in the near future.

______

Gear! Gear! Gear!

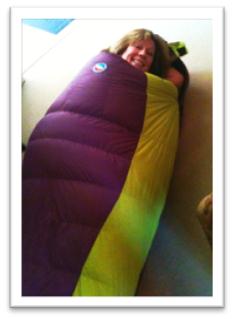
Backpacking sure is a lot of fun. It seems to be quite simple fun, too. We have romantic visions of sleeping under the stars on a soft bed of pine needles, watching shooting stars darting overhead, listening to loons calling across still lakes. It’s true that sometimes those moments of zen can be found in the wilderness. But, it’s not necessarily as simple as that. Just as likely, you may find yourself huddled at the bottom of a tree, soaked to the skin by a penetrating rain, cold and shivering as temperatures drop. And the loons? You couldn’t hear them over the thunder anyway! So what is the difference between these two scenarios? Simple. Preparation. And Preparation means Gear to our first-time Trail Dames backpackers.

Gear includes all that stuff that makes your life comfortable and safe in the outdoors. In some cases, your gear may be what keeps you alive. What do you need? A pack, tent, sleeping bag, compass, map, flashlight, a really cool multi-tool, the ice axe the guy at the outfitter said you’d need at elevation (has he ever been to the Poconos in winter?). And what about the solar-powered microwave, wicking wrist warmers, heart rate monitor, and climbing ropes? Whoa! How did this get so out of control? I can’t carry all that stuff, and neither can you. We could take some really cute sherpas along, or perhaps rent some pack mules, but that’s probably too much work, too.

Think about how our lives become simplified by living on the trail. We have three tasks every day that we are on the trail. We walk, we eat, we sleep. That’s it. Life is simple. So, as we consider gear, we need to think about what we need to walk, eat and sleep. This clinic was a basic orientation. So, we didn’t go into painful detail about each piece of gear we’ll need. But we did cover the walk, eat, sleep tasks. So, let’s start there.

Walking: This is the meat and potatoes of your hiking experience. Well, you could also have meat and potatoes for dinner, but let’s save that for another clinic. When walking, we need to think most about our feet and our backs. We need good fitting shoes or boots, good socks dedicated to hiking (not cotton athletic socks), and we need a VERY well fitted backpack. An ill-fitting pack, one that is not adjusted and strapped on properly, will suck the energy out of you and recruit your spine to the dark side so that it becomes a construct of pain rather than support. We’ll save the footwear discussion for another clinic and go straight to the backpack.

FITTING A BACKPACK: Backpacks come in sizes. Features such as capacity, access points, water bottle holders, etc., are great, but if the size does not match your torso length, you will struggle. And torso length has nothing to do with your dress size or height. Short people may have long torsos and tall people can have short torsos. The only way to know your torso length is to measure your torso length. Armed with this measurement, you can make a good pack choice.

It helps to have a second person assist you when measuring your torso. Use a tape measure and stand up straight, feet together and shoulders back. Now, drop your chin to your chest. At the base of your neck on your back you should easily feel a bump. This is your C7 vertebra. This is the start of the measurement. Now, find your iliac crest by putting your hands on your hips, thumbs pointing towards each other across your back. The imaginary line connecting your thumbs marks your iliac crest. The length measured from the C7 vertebra to the iliac crest is your torso length. Backpack manufacturers have different guidelines, but generally, 15″ to 17″ is a small pack, 17″ to 19″ is a medium, and 19″ to 21″ is a large pack. Some manufacturers also make XS and XL packs, and many are adjustable for an inch or two. If you get this measurement right, you will be well on your way to a comfortable carry on the trail.

When considering a pack, volume is also important. For our Trail Dames purposes, we will be doing mostly weekend trips. Buying a very expensive lightweight or ultralightweight pack may not be so important for short trips. And, the high end fabrics that go into making such packs makes them more expensive. Considering that we will be sharing some gear and carrying less food on weekend trips, a less expensive, heavier, more basic pack should be just fine for our basic beginning trips. Go to an outfitter or sporting good store and try on packs that suit your torso length. Get some weight into the packs when you try them. Outfitters usually have sandbags available. But if nothing is available, put some merchandise in the pack and weight it down with 20 or so pounds. An outfitter will be pleased to show you how to adjust the straps, but if you are on your own, remember to fasten your straps from the bottom up.

Here are the steps to putting on a backpack properly:

1. Loosen all straps. Slip your arms through the straps and lean forward, bending from the waist. Center the pack and balance the weight. Now tighten the hip straps. Many guides say that the hip belt should fall just at your belly button, but I’ve found that most women like it slightly lower than this. Each person is different, though. Start out by tightening the hip belt at the level where the waist of your favorite jeans falls.

2. Now stand up straight. Pull down on the shoulder strap adjustments until they are snug.

3. Reach up above the shoulders and pull the load lifter straps forward. This should form an approximately 45 degree angle from the pack to the top of your shoulders.

4. Adjust the sternum strap across your chest.

These are the basic steps. Depending on the pack, there may be other adjustment options. And, no adjustment is permanent. No one ever puts on a pack after breakfast and doesn’t make adjustments several times throughout the day. Strap placement and features, and your particular body shape will impact the comfort level of your backpack. The only way to know if the pack is right for you is to try it on.

Now that you have an idea of what to look for when purchasing a pack, I’m sure you are wondering where to buy a pack. REI and Eastern Mountain Sports are major outfitters in the Delaware Valley. You can also find backpacks at places like Dick’s Sporting Goods and Cabelas, too. Salespeople may or may not have expertise to help you at any of these stores. I think REI is usually pretty good when it comes to knowledgeable staff, but there is no substitute for your own knowledge. If you go in there with a basic understanding, you will be able to make a better purchase.

You can also check for deals on eBay, but of course, you will not be able to try on a pack before purchasing. If you go this route, be very careful, do your research, and know the seller’s return policy. This is not my recommended route for obtaining a first-time backpack, but I know that it’s possible (if not necessarily probable) to get an amazing deal on a wonderful pack through an online auction.

I hope you found this summary of our first clinic helpful. If you missed our first meeting, no problem! Come on out and join us at another clinic soon. Members of the Delaware Valley Trail Dames can visit our Meetup site to see a full schedule of events. I look forward to seeing you on the trail!

Backpacking Command Control

 Guest post from Trail Dame Sandi Adams

  Generally the command center begins to take shape 7 days out…

First, a corner, expanding quickly to the corner chair and creeping over the end of our bedroom. The spreadsheet has been printed with the highlighter nearby. A nearobsessive affair with the weather channel begins. Backpack has been emptied and slowly expandsas things are added and checked off the list.
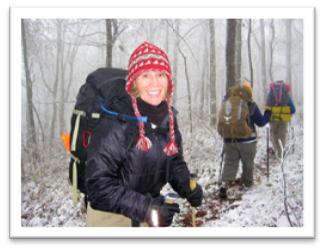
 Ethel, my zero degree Big Agnes sleeping bag, goes in first, followed by my tent and footprint.

My new treasure, the Exped 9 down mat sleeping pad is next. (Homage to the eternal challenge for adapting my sleeping system to my old bones and cold nature.)

Next, a stove and fuel are tucked in the crevices. My tinypersonal kit, face wipes, Vaseline, contacts case, toothbrush and paste are slipped in the mix. (A far cry from the usual menagerieof items needed to put this 52 year old together!) Meals are packed in individual bags carefully labeled with a sharpie, needing only boiling water to turn them into delicious treats on the trail. 

Rain
gear is wedged in a front pouch. Two days of clothes and layers, extra socks, (always pack extra socks!)
and a zip lock crammed with mittens, a hat, and jacket in the event of cold finds its way into the pack. The top pockets share the ten essentials and snacks along with my beloved Freshy Freshetteand trusty trowel. My tervis mug, (keeps hot things hot and cold things cold!) hangs off the outside of the pack next to my super long spoon and a pink bandana.

When it is all said and done, a pack weighing about 30-35 poundswill take the place of the spread. My life for three days will depend on its contents… I think that is what I love the most.
The simplicity. The challenge to strip off the
needs
desires and distractions
of the day to day. Down to 35 pounds of basic survival. To go where many choose not to go and see what many never see. Iconsider it all blessing to strip down and walk off and enjoy the peace and closeness of beautiful creation.   Did I mention I leave Friday?
“In wisdom gathered over time I have found that every experience is a form of exploration. “
Ansel Adams

Backpacking with the Maryland Dames!!

Oct 2010 MD Trail Dames Backpacking Trip 012
Five of us went and we left my home at 7 am. Many thanks to my son Adam for riding along so that he could drive the van back home. We were at the trail head by 8 am and on the trail at 8:10 am. The day was windy and cool but once we got moving we all warmed up. The wind in the trees made them seem to be speaking to us as we passed – the creaking, groaning, sighing sounds that trees make when brushing against one another made the forest come quite alive around us. The trail was carpeted in multi-colored leaves. We hiked along chatting, laughing, and feeling wonderful. At one point the wind drove a cloud up over the mountain and into the woods around us, surrounding us in a faint swirling mist. We were hiking on the last 3.5 miles of the 13 mile long “roller coaster” on that northbound stretch of the AT, a long stretch of constant ups and downs – more ups than downs – so it took us about 2 1/2 hours to make our first goal – the gorgeous vista from Raven Rocks. We took that chance to drop our packs, have some snacks, and take lots of photos. We were feeling great! A gentleman came up the trail behind us with just a fanny pack. He was on his way to the Blackburn Trail Center (7 miles from Snickers Gap). We chatted and he went on his way.

I really wanted to make the David Lesser shelter by 4 pm so that there would be ample time to set up camp, change clothes, get water, cook dinner and relax before going to sleep. We were making excellent time. We hiked at our own paces, so more often than not the two Sues and Mylynh were several minutes ahead while Audrey and I brought up the rear. We’d all catch up now and then for lunch and rest breaks. At Blackburn Trail Center Sue V. went down the side trail to see the center while the rest of us waiting on the trail and rested. We all moved out when we were ready to go and we all were at the shelter by 4 pm – the two Sues arriving ahead of us. What a fabulous feeling to know you’re done for the day! We had done 10.5 miles in about 8 hours. Some of the ups were pretty steep, there were rocks, rocks, and more rocks often making it hard to distinguish the trail bed from the woods.

We were the first ones into the shelter (a hiker was tented below in the campground) and made the decision to just spend the night in it rather than in our tents. Two middle-aged men came in a short while after us. By the time the sun had set there were 14 hikers stopped for the night. We laid out our places on the upper platform, changed clothes, grabbed our water filters and fetch bags and headed down the steep 1/4 mile trail to the spring. Ugh! So far away! It wasn’t the trip down so much – – it was hauling all of that extra water back up! Once we were back we set about cooking our dinners, chatting about the day, and watching the other hikers arrive. The two men who had come in after us decided to sleep in the shelter as well, on the deck just below the platform. They cooked their dinners at the picnic table near the shelter and started up a nice fire. We all went to sit by the fire as the sun went down. Very peaceful. By 7:30 pm I’d had enough, having been up since 4 am and being somewhat beaten down by the “ups” of the day, so I went off to bed. I never heard the others come in to sleep but I gather everyone was in bed by 9:30 pm. Fortunately, I had brought my ear plugs along……one of the men had laid out his mat and bag on the deck right up against the sleeping platform. His head was about two feet from mine….and he snored..and snored…and snored!! I could dampen it well enough with the plugs, but the others weren’t so lucky and had to listen to that horrid noise all night! He truly had no idea how close he came to being whapped upside the head with a hiking boot! It was the general consensus that he surely must have been aware that he snored like that (he said he was married, so his wife must have told him!) and therefore should have been considerate enough to set up a tent in the campground area! We were clearly there first and had our mats and bags laid out long before he did.

Everyone was up by sunup and fixing breakfast at the picnic table. We were somewhat sore and stiff but nothing terrible, and we were packed up and back on the trail by 8:20 am, with 10 miles to go to Harpers Ferry. Sunday’s miles would be easier in terms of the ups and downs as it was mostly flat and down but the trail bed was far rockier than the stretch we’d already covered. I’d done this stretch before and lost my big toenails because of the beating my feet took on the rocks. It wasn’t any different this time.

We were at Keys Gap before 10 am – a good place to drop the packs and sit at the picnic table there for a rest. Just 3/10s of a mile down the road west of there is a mini-mart, so Sue and I walked down for a snack and a cold soda. When we got back to the others a small car had pulled into the parking area and a man got out wearing a fanny packed that I recognized. It was the guy from the vista point that we’d met the day before! He came over to chat a moment. He was going to hike from Keys Gap to Blackburn Trail Center and back to finish up the last bit of trail that he needed to complete everything from Georgia to Pennsylvania. We wished him well and off he went, and so did we. From there to the border of Harpers Ferry National Park the rocks once again beat me up both physically and mentally. I find that I can’t relax for a second because every step has to be thought out in advance – step here, step there, go around that rock, step on top of that one, etc. Soon I was left in the dust by the others but that was okay. I could feel my toes getting chewed up in my boots and the bottoms of my feet getting bruised. I caught up with everyone now and then for a rest break. By noon or a little after, we were at the sign pointing the way down down down to the Hwy 340 Bridge and the end of the hike! We made our way down, some of us with legs of jello and sore joints, slowly. It’s a very steep down, and long, switch back trail and in some places it quite narrowly hugs one side of the mountain, with a long drop down on the other side, with rocks for stairs now and then. Once on the bridge, we marched along happy and proud. There was a long line of slow traffic going the other way and the looks on the faces of some of the people as they watched 5 women stride along with loaded packs……priceless! We decided to end it at the parking lot at the end of the bridge, and Sue V’s husband was kind enough to come pick us up. We had made it across the bridge and to the lot by 1:20 pm.

I admit to being quite sore and stiff but I was also very happy. It’s a grand feeling of accomplishment. I hope that everyone else felt the same way. I am quite eager to do it again! Well, not that section again! I’ve done it twice now – that’s enough. Today, Wednesday, I am completely recovered physically (though my big toe nails have darkened so I’ll have to wait and see how that goes), unpacked, and everything is put away until the next adventure!

Linda

Weather Forecasting for Hikes

Ever noticed that the forecast for the nearest town to a hike may be vastly different from the conditions up in the mountains?  You can get the forecast for any location in the mountains or in the middle of no-where using the NOAA website.  They have an interactive map that provides the “point forecast” for your hiking destination using a Google Map locator.

Here is an example for Tray Mountain:

Here is how I get this forecast:

1. Go to the main NOAA website and the left box labeled “Local forecast by “city, St.” Enter in the nearest town to the hike.

2. Scroll down to the middle of the page, and on the right side, locate a box with a google map labeled “Click Map for Forecast”. Move the map by dragging your mouse on the map and zooming in and out to locate where you will be hiking. Double click on the location to select the location of interest. It will then become highlighted by a green box. NOTE: I find it helpful to consult my National Geographic Trails Illustrated Map (#777 and #778 for our area) which shows detailed trail/town and road locations on a topo map so I can orient myself on the google map (which doesn’t always show trails but does have contours).

3. This will provide a forecast of the exact location of the hike. I take the forecast for the highest elevation I will be at for the day.

Here is more information if you have trouble or want to learn more.

Posted  by